Log in
To log in to our HPC resources, you can use SSH client or Open OnDemand. You can find more information here or on separate Open OnDemand page.
SSH client - terminal
In Linux/UNIX and Windows 10 and 11 open your terminal and type following command, use -p port when needed (default port is 22):
ssh -p 5522 user@login.devana.nscc.sk
where user is your username, the login01 or login02 will be selected randomly.
First log-in
If you obtain message about the authenticity of the host that can't be established during the first log-in, please, type yes.
If you want to log in specifically to the one of the login nodes, you can use the domain and port from the table.
| Login node | IP address / domain |
Port |
|---|---|---|
| login01 | login01.devana.nscc.sk | 5522 |
| login02 | login02.devana.nscc.sk | 5522 |
Windows
- Open new session from the "Sessions" button on top of MobaXterm screen.
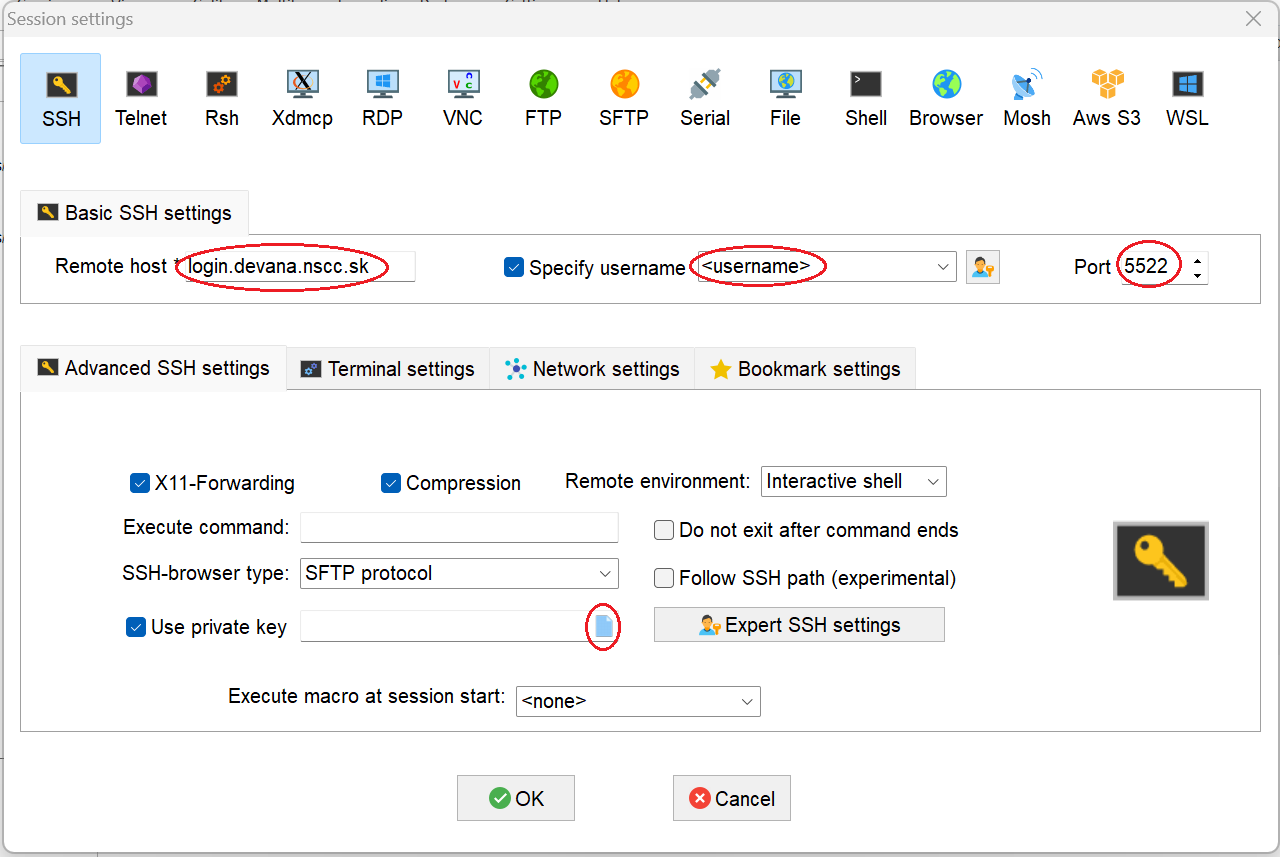
- Navigate to "SSH" and enter the "Remote host", "Username", and "Port" values. Select correct port (5522).
- Activate "Use private key" button and click the blue icon at the end of bar.
- Locate the desired private key and click "Open".
- Finally, click "OK" again to log into the remote server with key pair authentication.
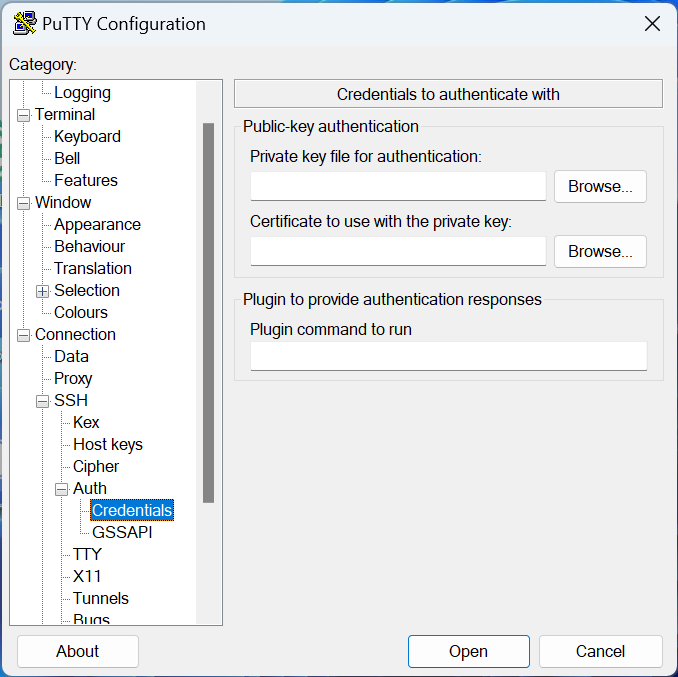
- Enter the remote server Host Name or IP address under "Session". Select correct port (5522).
- Navigate to "Connection" > "SSH" > "Auth" > “Credentials”.
- Click "Browse..." under "Authentication parameters" / "Private key file for authentication".
- Locate the desired private key and click "Open".
- Finally, click "Open" again to log into the remote server with key pair authentication.
OpenVPN client
Important
Following section applies for users who want to use the ANSYS software package.
The OpenVPN client file (devana_vpn_client.ovpn) can be download from a register portal under the VPN section (VPN icon).
The connection will work only with OpenVPN client version 3.X. It is recommended to use the latest stable version.
Tunnelblick app which is free software for OpenVPN on macOS can be also used. It is recommended to use the latest stable version.
For using ANSYS software you need to install OpenVPN client and software/plugin into web browser able to neviem co Two-factor Authentication or 2FA.
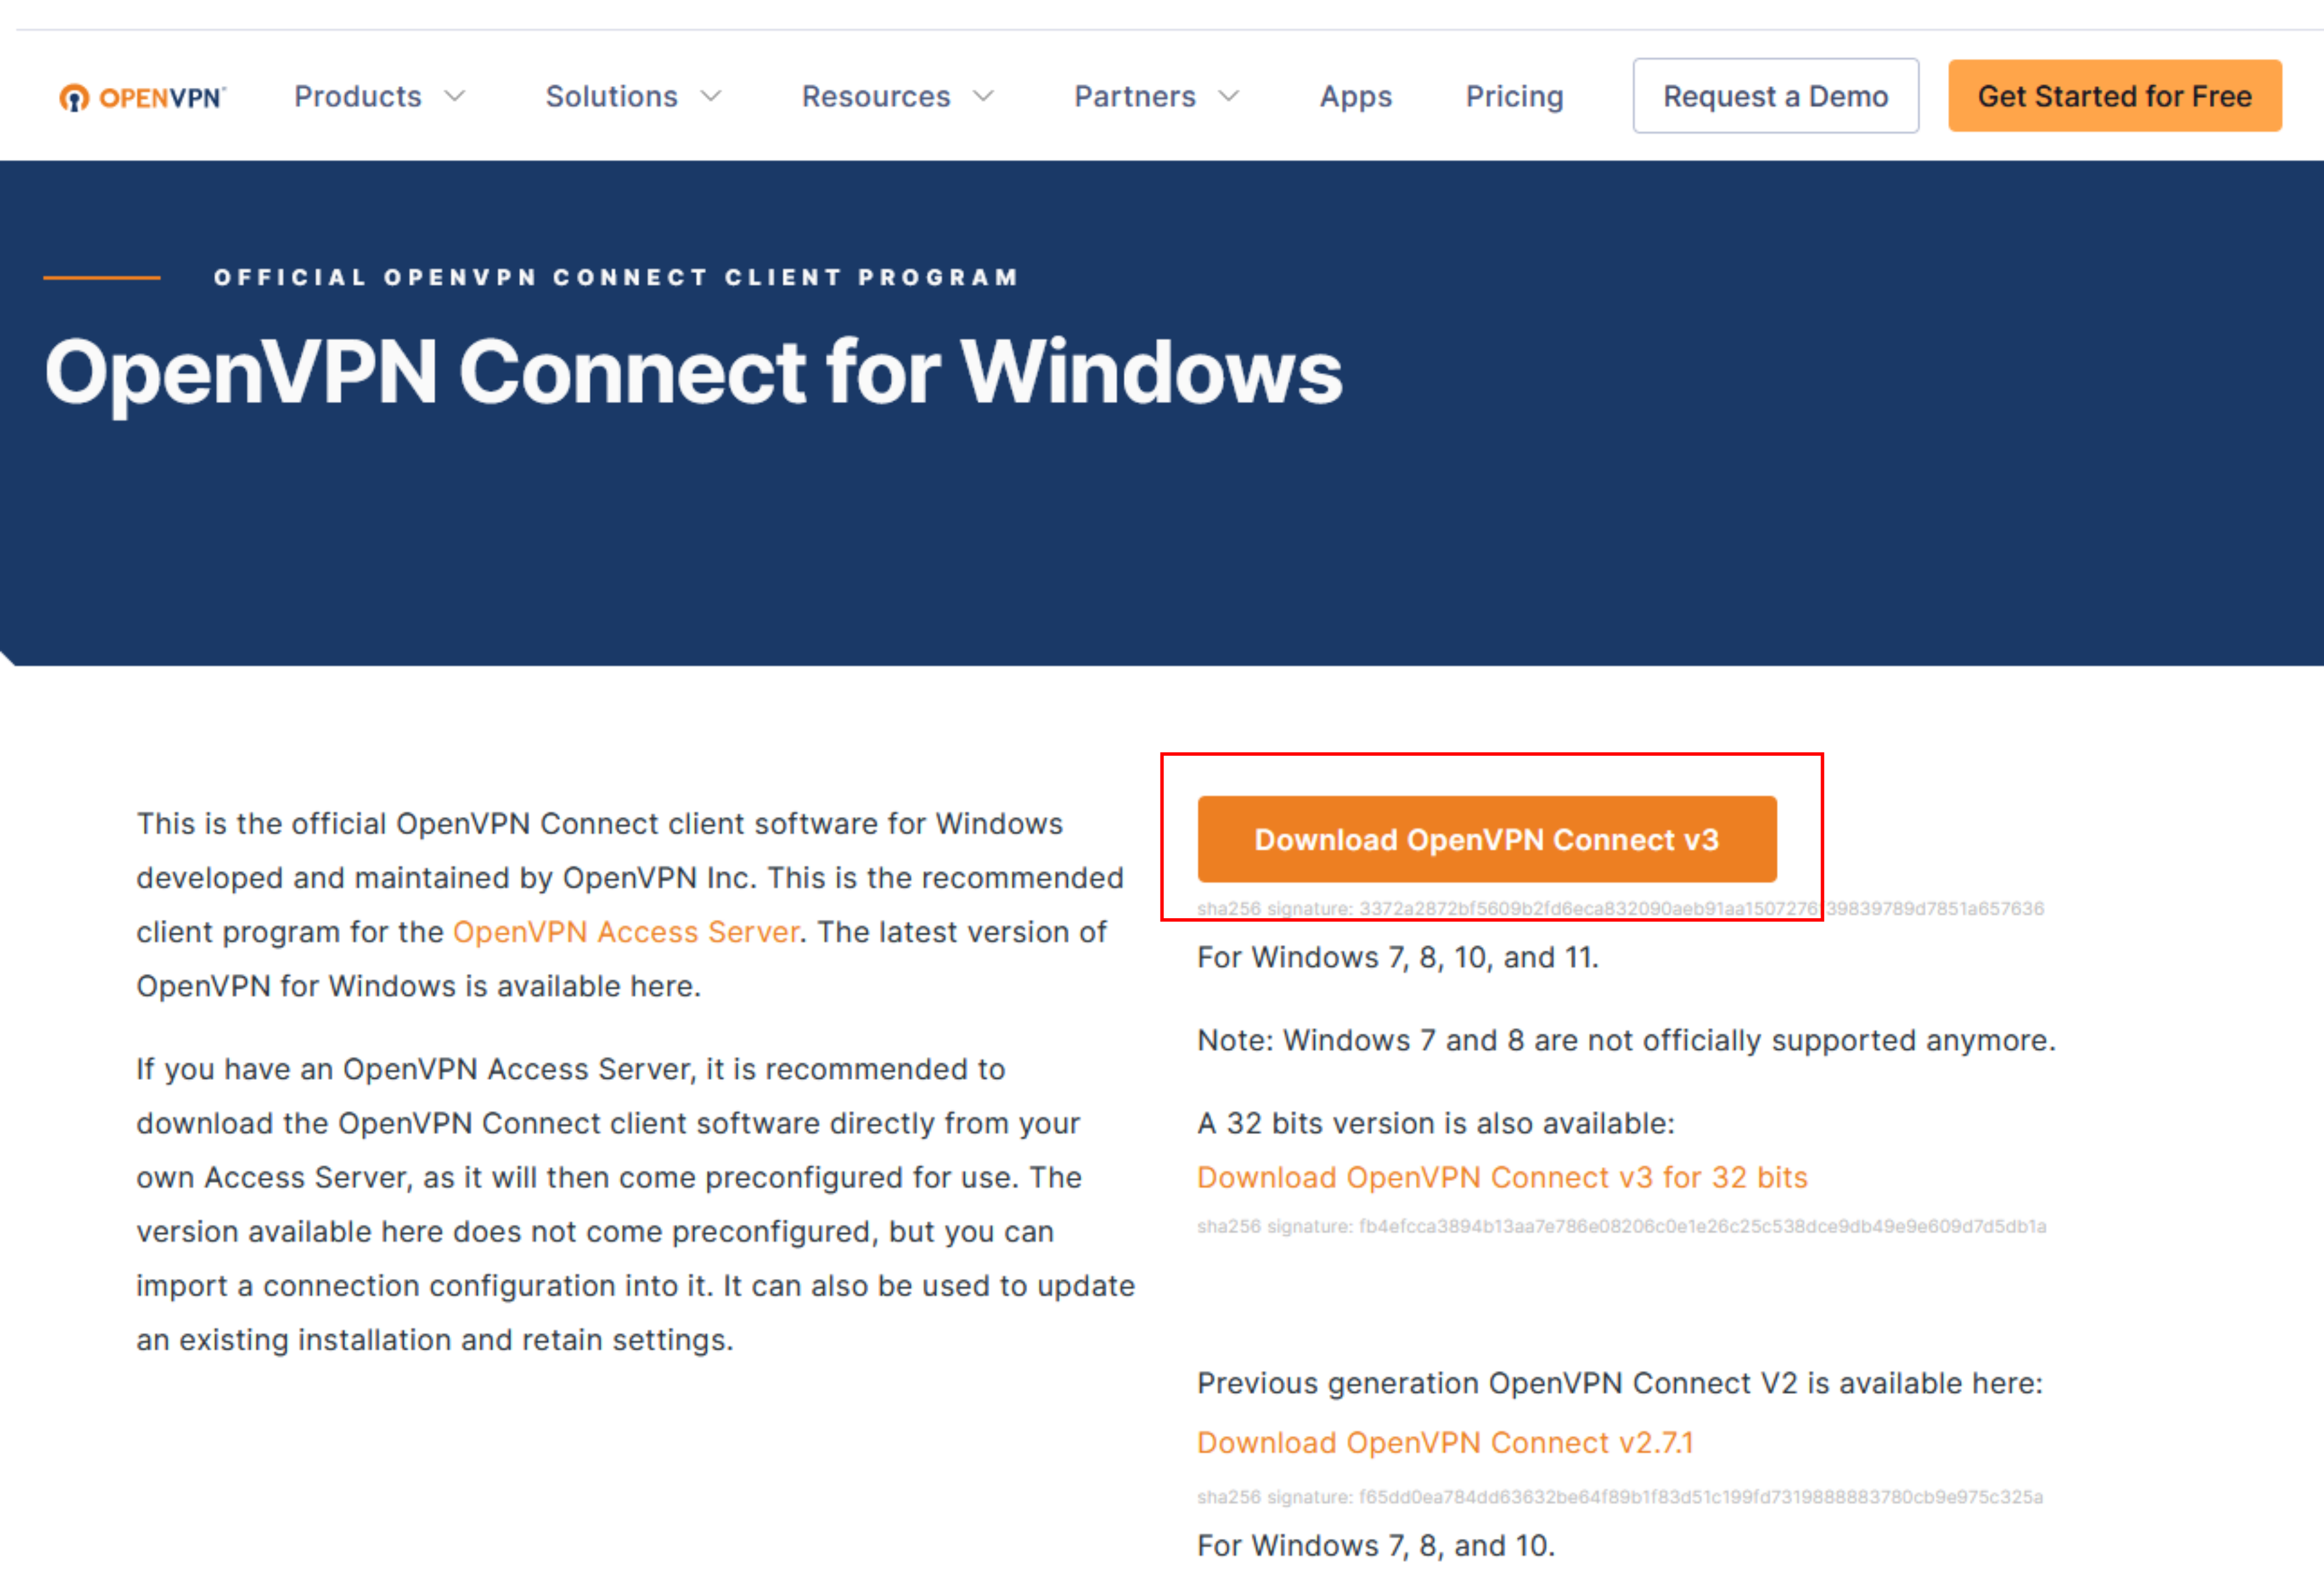
Visit the following website to download the OpenVPN client for Windows, and for macOS click here. Then, click on the 'Download OpenVPN Connect v3' button (see picture below)
Windows instalation process:
- Navigate to the directory where the OpenVPN software was downloaded, which is typically the 'Downloads' directory.
- Double-click on 'openvpn-connect-3.4.4.3412_signed.msi' (at this time) using the left mouse button.
- A new window will pop.
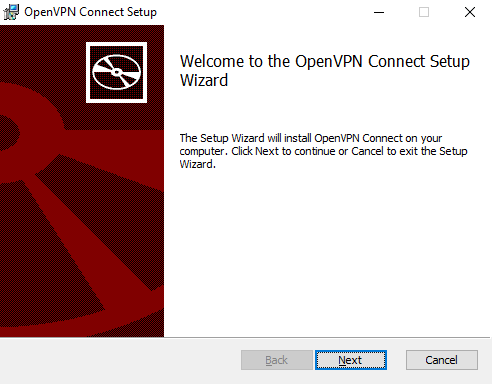
- Click on 'Next' button.
- It will move you to a new window where you need to mark 'I accept the terms in the License Agreement' and then click on the 'Next' button.
- Then click on the 'Install' button. If a new window pops up, click on the 'Yes' button. The installation will take a few seconds.
- After the installation process is complete, click on the 'Finish' button.

macOS instalation process:
-
Wait until the download completes, then open it.
-
Select the installer for your device (mac with Intel processor or mac with Apple chip).
-
Click Continue when the installer window opens.
-
Agree to the EULA and install.
-
When prompted, enter your device password to install.
-
Click Close when the installation completes.
-
Note: If you have already install Tunnelblick app you can use it.
Following steps are same for Windows and macOS.
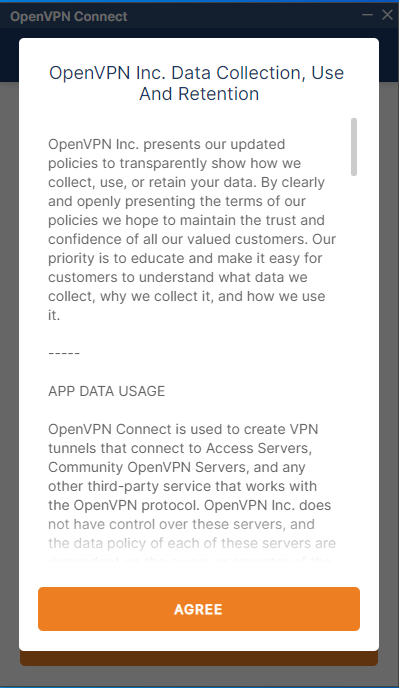
- To open the OpenVPN application, click on the Windows icon in the bottom panel on the left side. Type OpenVPN and click on the application. If the prompt shown in the image below appears, click the 'Agree' button.
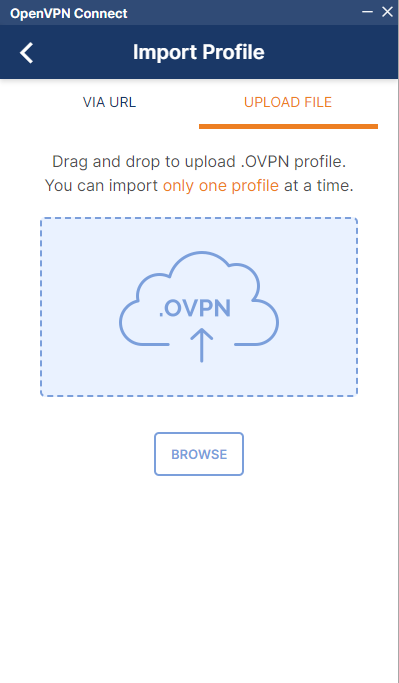
- It will take you to a window titled 'Import File'. Choose 'Upload File' and either drag and drop the client.ovpn file or find the client.ovpn file on your computer by clicking the 'BROWSE' button.
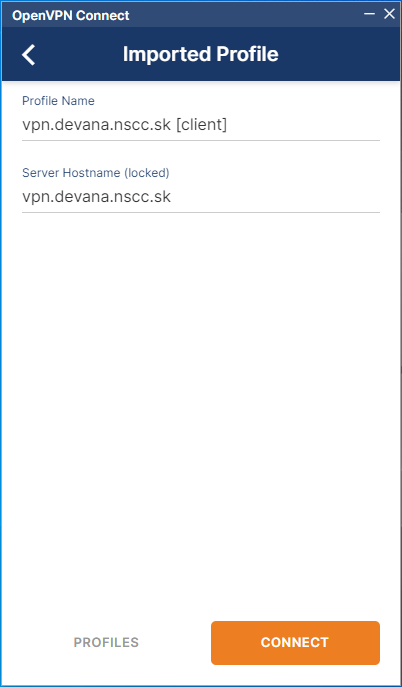
- In the next window, it will show the imported file information (see picture below). Click on the 'Connect' button.
 .
.
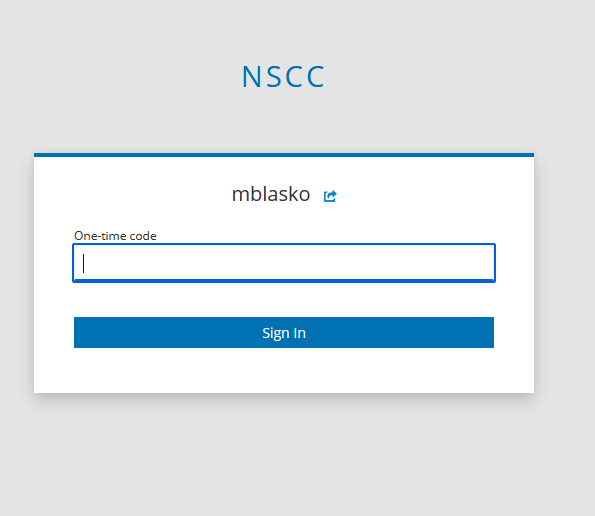
A new window will open in your default internet browser, and you will be asked to log in using the ID and password you used to log into the registration portal.
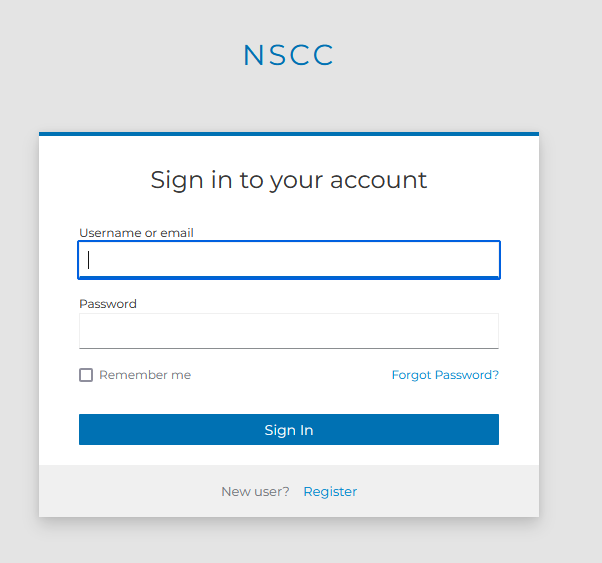
After you successfully login, you will be asked for one time password from 2-factor authentication or prompted to setup it up.
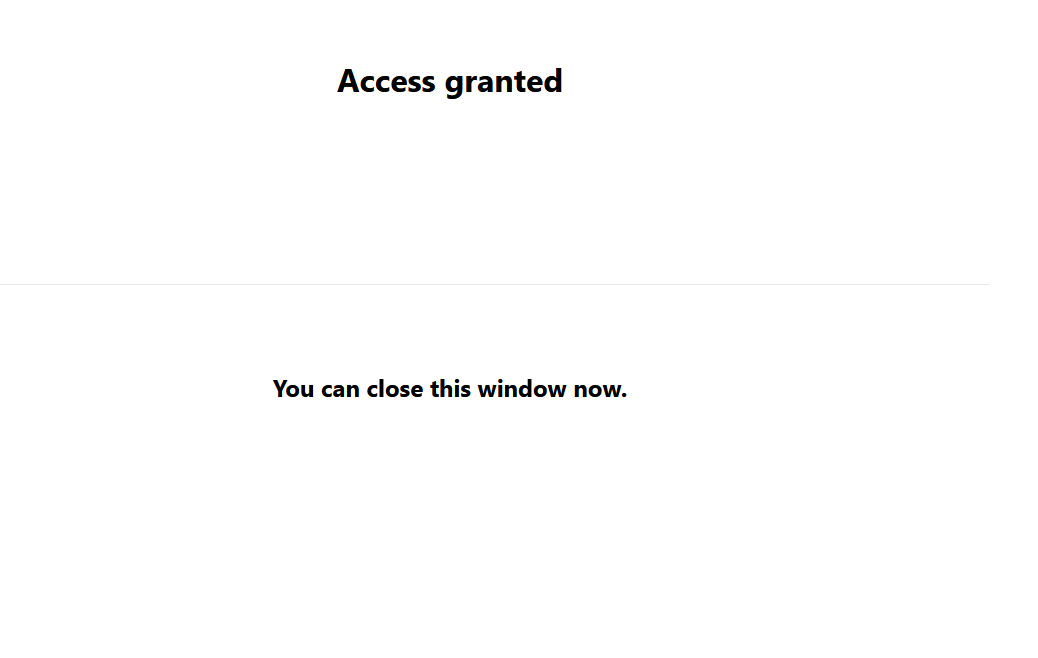
Upon successful authentication, you will see 'Access Granted' on your screen.
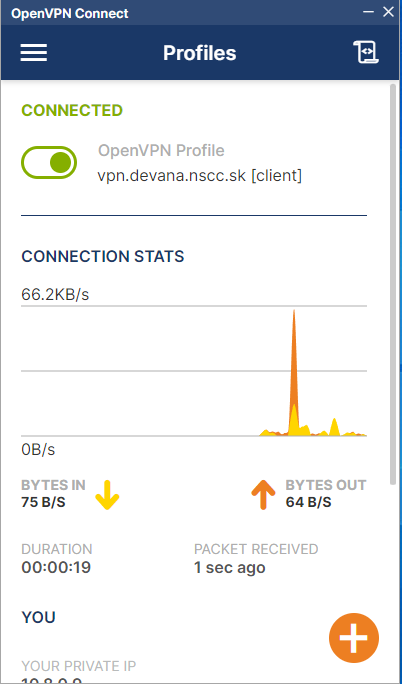
When you go back to OpenVPN app you should see 'Connected' status, see picture below.
First, check if your distribution is supported by the OpenVPN community on the following website.
The following Ubuntu versions were tested: Ubuntu 20.04 LTS (Focal Fossa) and Ubuntu 22.04 LTS (Jammy Jellyfish). Additionally, Linux Mint 21.1 (based on Ubuntu Jammy Jellyfish) was also tested.
First update the local package index using following command below, for this step you need to know sudo password. Then install apt-transport-https package using command below, which enables the use of HTTPS (HTTP Secure) repositories in APT (Advanced Packaging Tool ) package manager. It allows APT to securely download packages over an encrypted HTTPS connection.
sudo apt update

sudo apt install apt-transport-https

sudo wget https://swupdate.openvpn.net/repos/openvpn-repo-pkg-key.pub

sudo apt-key add openvpn-repo-pkg-key.pub

# if you have Ubuntu 20.04 LTS replace jammy.list with focal.list

sudo wget -O /etc/apt/sources.list.d/openvpn3.list https://swupdate.openvpn.net/community/openvpn3/repos/openvpn3-jammy.list

sudo apt update

sudo apt install openvpn3

# to check the OpenVPN 3 version, write the following into the terminal

openvpn3 version
After instalation check your openvpn version by typing openvpn3 version into terminal.
To connect to a VPN server navigate to the directory where devana_vpn_client.ovpn file is located or put whole path for your devana_vpn_client.ovpn file, example see below.
#when I am in the given directory
openvpn3 session-start --config devana_vpn_client.ovpn

#using whole path for devana_vpn_client.ovpn file
openvpn3 session-start --config /home/test/Desktop/devana_vpn_client.ovpn
A new window will open in your default internet browser, and you will be asked to log in using the ID and password you used to log into the registration portal.
After you successfully login, you will be asked for one time password from 2-factor authentication or prompted to setup it up.
Upon successful authentication, you will see 'Access Granted' on your screen.
To display if you have been susscesfully conected run following coomand (first line in grey box below) see below in the box also with output example, where in the last line is the connection status.
test@x1:~$ openvpn3 sessions-list
-----------------------------------------------------------------------------
Path: /net/openvpn/v3/sessions/2996e9c1sf35es49c0s91c3s5b2afc4cae4c
Created: Wed Feb 14 14:42:11 2024                  PID: 8750
Owner: test                                  Device: tun0
Config name: /home/test/Desktop/devanaclient.ovpn  (Config not available)
Session name: 147.213.81.142
Status: Connection, Client connected
To close VPN connection run following command:
# In this case, the whole path is used for devana_vpn_client.ovpn client

openvpn3 session-manage --config /home/test/Desktop/devana_vpn_client.ovpn --disconnect

# the following will be written on the screen after a successful disconnection
Initiated session shutdown.